I get a lot of questions about how I have enough time to bake and be a student. Cupcaking is my creative outlet. I feel like all day I have to act professional and focus on differential diagnoses, but when I get home and hear the clink of the paper liners in the cupcake tin, I get excited about the countless possibilities of cake, frosting, decoration, and so forth. I just make sure to take the time to bake, and sometimes it gets spread over a couple of days.
Sometimes I get a little carried away with taking things to the next level, and I'll spend hours crumbling graham crackers by hand for the perfect crust to a s'more cupcake. It only makes sense when I saw on the Reynolds website an idea for making cupcake bouquets that I had to try it!
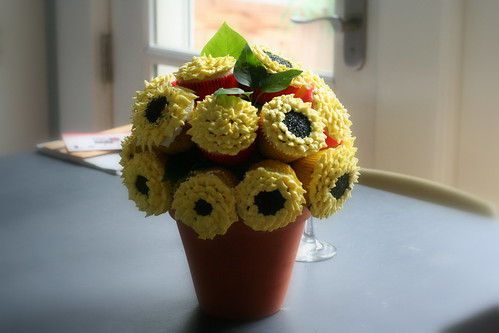
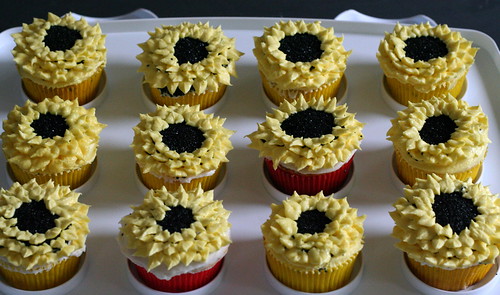
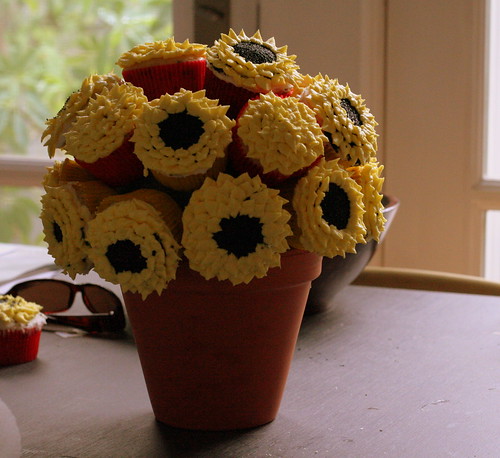
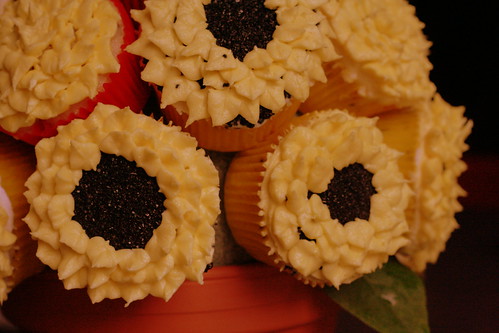
I bookmarked the idea for a later date, and the opportunity finally arose when Allie decided to have her Tea Partay. Surprisingly, it wasn't too difficult to make a cupcake bouquet! It took a lot of patience, however. I made the Earl Grey cupcakes and iced them to look like sunflowers and chrysanthemums the night before. You can use whatever kind of cupcake you want (and obviously decorate them however you like) but it is important to use a dense cupcake so that it will stay put on a popsicle stick. Also, you don't want the icing or topping to be too heavy, otherwise it might fall right off the cupcake!
Assembling the bouquet took about 30 minutes or so. I didn't really time it, but it depends on your patience level and how well the cupcakes stay put. I would not recommend making this far in advance, because gravity will get the best of some of the more precariously placed cupcakes. Although the bouquet holds 19 regular sized cupcakes, it's a good idea to have a couple of extra in case you need it.

Cupcake Bouquet
- 1 6" diameter Styrofoam ball (preferably green)
- 1 6" diameter terra cotta pot (or vase)
- hot glue gun and glue sticks
- Thick popsicle sticks, broken in half
- Approximately 22-25 cupcakes
- 1 rock to fit in the bottom of the vase
- Leaves, optional
- Ribbon, optional
- Sharp tipped knife
- toothpicks
1. Place a large rock in the bottom of the vase. This is so when you are decorating (or when people are removing cupcakes as they are enjoying) the bouquet it does not fall over.
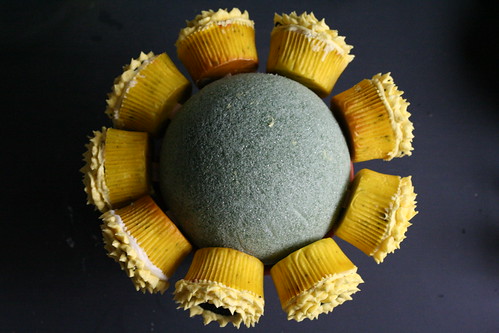
2. Use the hot glue gun to attach the Styrofoam ball to the pot. Allow it to dry.

3. Place a cupcake so it sits just on top of the rim of the pot. This is where the row of the bottom flowers will go. Make a mark with a pen or the knife to mark the center of the cupcake. Make a slit in the Styrofoam and firmly push the half of the popsicle stick into the ball. You want to leave about an inch of it sticking out so that the cupcake can be put on it. It is best to angle the popsicle stick a little upwards so that the cupcake won't fall off.
 3. Make a slit in the bottom center of the cupcake. Stick the cupcake onto the popsicle stick so that the cupcake is firmly attached to the popsicle stick. Step back and take a deep breath. Admire your work! Only eighteen or so more to go!
4. Carefully place another cupcake next to the one you have already attached to the Styrofoam ball. Again, mark the center of that cupcake so you know where to insert the popsicle stick. It will be about 1-1.5 inches away from where the current cupcake is already placed. Again, insert the popsicle stick and make a slit at the bottom of the cupcake. Push the cupcake onto the popsicle stick.
 I also have to say that I love how the picture above looks like a face!

5. Keep going around the base of the vase (while listening to Ace of Base?) until you get all the way around to where you started. This should take 9 cupcakes. If things aren't evenly spaced, don't stress! You can easily cover gaps by adding leaves (as I will discuss below).

6. Start the second layer of cupcakes in between two of the cupcakes from the bottom layer. I was able to fit seven cupcakes using the technique I described above. Again, it's OK if things aren't as evenly spaced as you would like since it's very easy (and beautiful!) to cover up the gaps using leaves.
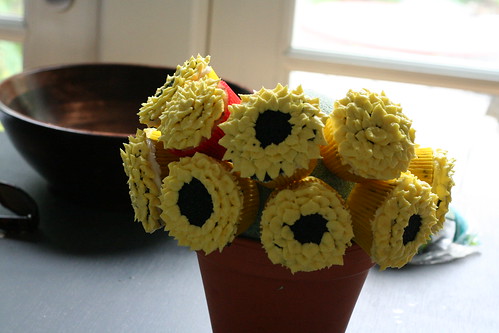
7. For the top layer, I had two cupcakes... because I ran out of cupcakes! Three would fit nicely. They don't need to be in a circle. Place them as you see fit. And ta da!! You did it!
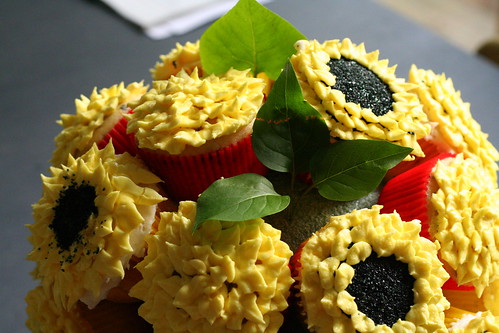
8. I didn't like the spaces above, so I went outside and picked some leaves from our yard. I washed them and then used a toothpick to attach them to the vase in various bald spots. If I was on a cake TV show I would have made one of my assistants make them out of fondant or chocolate clay. But I liked the contrast of the real leaves and the cupcake flowers.
9. You can add more color by tying a ribbon around the pot and attaching it with the glue gun. I chose not to do that since I thought a lot was going on with the cupcake flowers.
10. Pat yourself on the back and now photograph your beautiful work!
Unfortunately, these are not the easist to transport. Charlie was sure to drive carefully on the way to the party, but I held my breath most of the way since I was so worried! The entire bouquet also comes out quite heavy. You may want to advise the lucky recipients of your cupcake bouquet to use a Jenga approach when eating them so that the bouquet doesn't fall over. That is, try to remove cupcakes from different sides, not all the same side (although hopefully the weight at the bottom will prevent it from falling).
At the party, several people thought that they were real flowers! I was so touched and flattered :) Is this my crowning cupcake achievement? I don't know, but I hope that I have the opportunity to make it again! You can save the pot and the popsicle sticks so the next time around all you have to do is make the cupcakes and place them on the already placed popsicle sticks.

I got a little carried away taking pictures, but I was so pleased with how it turned out. I hope that you enjoyed looking through them :)